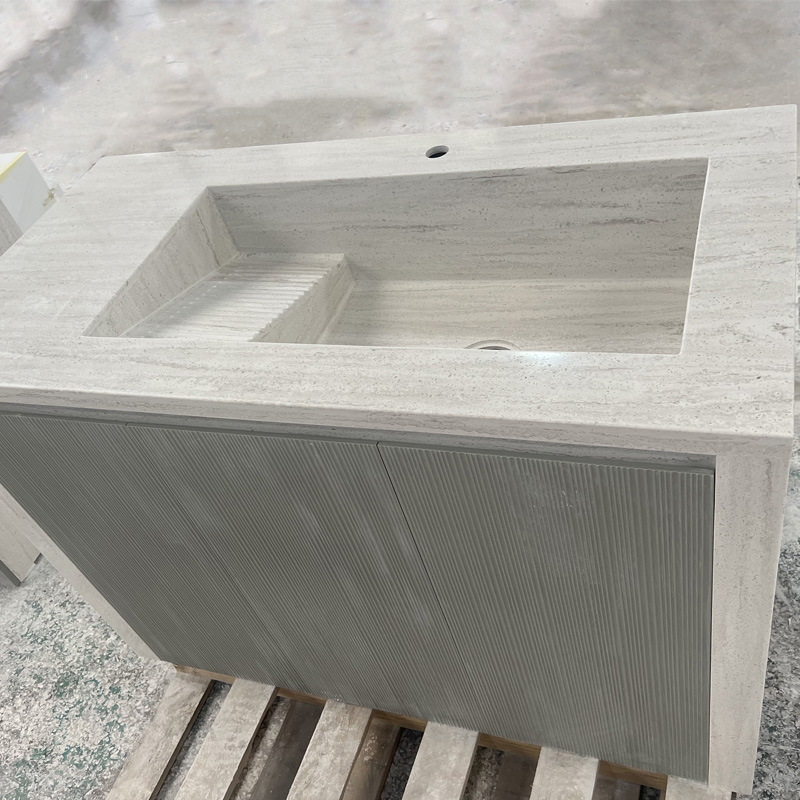
Integrated Sink countertops are increasingly popular due to their sleek design, ease of cleaning, and minimalistic appearance. Unlike traditional separate sink and countertop designs, integrated sinks seamlessly blend into the countertop, providing a smooth, uninterrupted surface. This type of design not only enhances the aesthetic appeal of your bathroom but also simplifies maintenance. However, installing an integrated sink countertop requires precise steps and professional expertise. In this article, we will guide you through the installation process.

Before installation begins, the countertop and sink need to be customized according to the specific dimensions and design preferences of your bathroom. The preparation phase involves:
Measuring the Space: Accurate measurements of your bathroom are essential to ensure the countertop fits perfectly. This includes measuring the length, width, and depth of the area where the sink will be installed.
Material Selection: Choose the appropriate material for the countertop, such as quartz, engineered stone, marble, or ceramic. Your choice will depend on the budget, design aesthetic, and functional requirements of the bathroom.
Design and Cutting: The integrated sink and countertop need to be designed to match your bathroom's layout and the shape of the sink. Cutting and shaping the material are done based on the precise dimensions to ensure a seamless connection.
Before installing the new integrated sink countertop, any old countertops and sinks need to be removed.
Remove the Old Sink and Countertop: Carefully detach the old sink and countertop from the bathroom. This step involves loosening plumbing connections and removing any fasteners that hold the countertop in place.
Clean the Area: Once the old countertop is removed, clean the installation area to remove any debris, dust, or residue. This ensures the new countertop will be placed on a clean surface.
The core of the installation process is placing the integrated sink and countertop. This step requires precision to ensure the countertop fits snugly in the designated area.
Placing the Countertop: Position the custom-cut integrated sink and countertop into place. Make sure it aligns correctly with the surrounding walls and fixtures.
Leveling the Countertop: Ensure the countertop is level, both horizontally and vertically. This step is crucial to ensure proper drainage and prevent water pooling on the surface.
Securing the Countertop: Once aligned, secure the countertop to the vanity or wall using appropriate fasteners or adhesives. Make sure the sink and countertop are firmly attached to prevent movement.
After the countertop is in place, the plumbing and drainage systems must be connected.
Connecting Water Supply: Attach the water supply lines to the integrated sink. Ensure that the faucet or water inlet is correctly installed and connected to the water pipes.
Connecting Drainage: Connect the sink’s drainage system to the existing plumbing. Ensure the drainage pipe is properly aligned and sealed to prevent leaks.
Installing Faucet and Accessories: Install the faucet, drain stopper, and any other accessories that are part of the integrated sink system.
After installation, it’s essential to inspect the entire system to ensure everything is functioning properly.
Level Check: Double-check the countertop and sink’s level to ensure proper alignment. This is critical for drainage and to avoid water spillage.
Leak Test: Turn on the water and check for any leaks in the plumbing connections. If leaks are detected, tighten the connections or reseal them.
Drainage Test: Test the drainage system by running water to ensure it drains correctly without any blockages or slow drainage.
Once the installation is complete, clean the countertop and sink to remove any debris or dust left from the installation process.
Cleaning the Countertop: Use a mild cleaner and a soft cloth to wipe down the surface. Avoid using harsh chemicals that can damage the material.
Sealing the Surface: Depending on the material of the countertop, apply a protective sealant to help maintain its appearance and durability.
Routine Maintenance: Regularly clean the surface to prevent stains and build-up. Follow the manufacturer's care instructions to preserve the integrity of the material.
Installing an integrated sink countertop in your bathroom is a meticulous process that requires careful planning, precise installation, and attention to detail. Due to the complexity of plumbing and precise cutting required, it's recommended to hire a professional for the installation to ensure everything is installed correctly. With proper installation, your new integrated sink countertop will enhance your bathroom’s aesthetic, improve functionality, and provide a low-maintenance solution for years to come.

No. 27, Henglong Road, Lamma Village, Daojiao Town, Dongguan City, Guangdong Province
E-mail:vivianlauyu@gmail.com
True Transmission: +86 15817685325

Scan the QR code
Service hotline
Copyright © 2025 Dongguan Ouyaxuan Decorative Building Materials Ltd. All rights reserved.
